
New cabinet pulls can change the feel of a kitchen without replacing its cabinets. But two handles that look the same size in a shopping photo may use different mounting holes. A matching finish is useful only after the hardware fits.
Before ordering a full set, make a record of the cabinets you actually have. Check the holes, mounting thickness, and space around each handle, then try one compatible sample. This guide focuses on replacing ordinary rear-mounted pulls using existing holes.
Start with the hardware already there
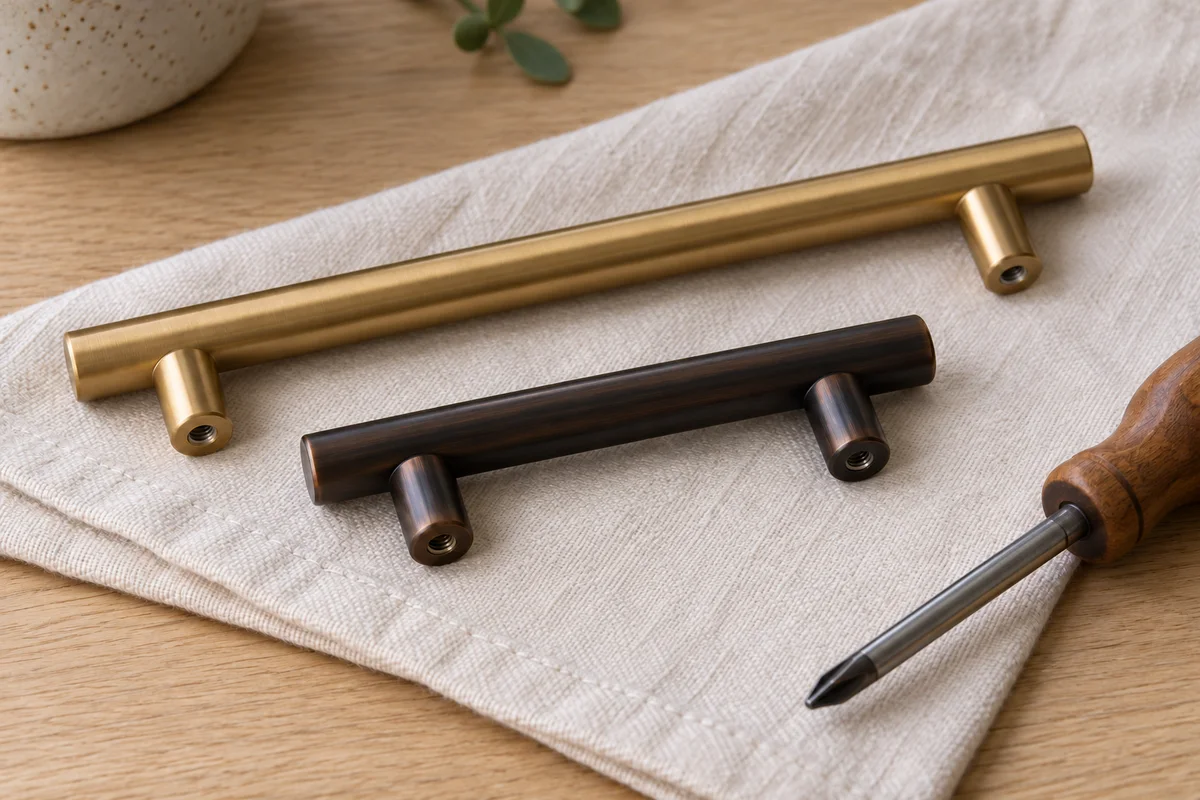
A knob usually uses one mounting hole; a typical bar pull uses two. Some handles have adjustable mounting points, multiple hole options, or a different fastening arrangement. Identify yours before comparing products.
In a rental, confirm permission to change the hardware and whether the originals must be reinstalled later. Photograph each style and keep removed handles with their screws in labeled bags. Avoid assuming a change is reversible merely because it uses a screwdriver: a different base may expose an old mark or affect the cabinet finish.
If a handle is integrated into the door edge, has concealed fasteners, or does not release as expected, find the cabinet or hardware instructions before proceeding. Do not pry it off.
Measure hole spacing, not the ends of the handle
For a two-hole pull, the key fit measurement is the distance from the center of one mounting hole to the center of the other. Listings may call this center-to-center, CTC, or hole spacing. The overall length runs from one end of the handle to the other and can be longer than the mounting distance.
Liberty’s cabinet hardware measuring guide illustrates this distinction and shows measuring the existing holes. Use the actual holes as your reference rather than estimating their locations from the outer edges of a curved handle.
When removal is permitted and the fasteners are accessible, support the pull from the front and remove its rear screws with the appropriate hand screwdriver. Keep the parts together. Measure between the hole centers with a ruler, record the result in inches, and take a clear reference photo. Check the removed pull’s mounting points as a second reference.
For example, a hypothetical pull might be 4 1/2 inches long overall but have 3-inch hole spacing. A replacement described as “4 1/2 inches long” does not tell you whether it fits those holes. You need its mounting dimension too. A 3 3/4-inch mounting pattern would not match the 3-inch pattern simply because the handles look similar.
Do not round a measurement to the nearest available size to make a listing seem compatible. If a product uses a metric specification, retain that exact specification and ask the seller to resolve any uncertainty instead of treating a rounded inch conversion as proof of fit.
Make an inventory before counting the order
Measure each distinct group: small drawers, wide drawers, upper doors, and lower doors. Cabinets added at different times may use different hardware even when the finishes match. Record knobs separately from pulls.
Use a worksheet like this:
| Cabinet group | Count | Mounting record | Extra check |
|---|---|---|---|
| Upper doors | Your count | One hole or measured pull spacing | Grip and clearance at neighboring doors |
| Lower doors | Your count | Measured pull spacing | Base coverage and door thickness |
| Small drawers | Your count | Measured pull spacing | Access to rear fasteners |
| Wide drawers | Your count | Number of pulls and spacing for each | Complete drawer-front thickness |
Count actual pieces rather than multiplying the number of doors by an assumed standard. A wide drawer may have two separate pulls, and a pack quantity may refer to handles rather than pairs. Check what the seller includes.
Match the fasteners to the assembly
Open a door and a drawer and compare the fastening locations. A drawer screw may pass through both a drawer box and an attached decorative front, while a door screw may pass through a single panel. Measure the complete thickness the screw passes through at the mounting point.
The Home Depot’s installation guide discusses different screw lengths for different mounting thicknesses and warns against overtightening. The right length for your replacement also depends on its threaded mounting post and the maker’s instructions. This guide does not provide a universal screw-length formula.
Confirm the screw diameter, thread, length, and permitted installation with the exact hardware manufacturer or seller. Existing screws are not automatically compatible with a new pull. Do not force a screw that binds, or assume a longer screw will tighten a handle that remains loose. Ask for the specified fastener instead of improvising a stack of spacers.
Check what surrounds the handle
Hole spacing is only one part of the decision. Compare the replacement’s overall length, projection from the cabinet, and base shape. Look for nearby walls, appliance handles, neighboring doors, and corners where hardware could meet when opened.
A different handle may fit the holes yet reveal a ring, scratch, or finish difference beneath the old base. Inspect one permitted sample location before ordering the rest. Clean only as allowed by the cabinet’s finish instructions; do not sand, fill, or enlarge holes as part of an assumed simple swap.
Check the grip as well. Can household members comfortably get their fingers behind it? Does its end catch clothing in a narrow route? Photographs and dimensions help narrow the choice, but a sample makes these questions easier to assess.
Try one sample before replacing the full set
Keep packaging and check return conditions before opening a bulk order. Try one compatible sample on a representative door, then check a drawer if its mounting assembly differs. Follow the product’s installation instructions, tighten with control, and avoid overtightening.
Open the door or drawer slowly through normal use. Check that the pull seats correctly, remains secure, feels comfortable, and does not collide with anything nearby. If the screws resist, the pull rocks, or the existing holes do not align, stop and resolve the mismatch. Do not pull the holes into alignment with extra force.
Once the sample works, order from your inventory and keep a record of the exact model, finish, mounting dimension, and required fasteners. Store the original hardware by location if you may need to reverse the change.
For another kitchen improvement before buying more accessories, try our small kitchen drawer organization guide. If the hardware is one part of a wider refresh, use the staged shopping approach in reversible living room updates to separate useful changes from optional decoration.
Sources and further reading
- Liberty: Cabinet Hardware Measuring Guide (PDF hosted by Lowe's)
Distinguishes center-to-center hole spacing from overall pull length and illustrates measuring existing holes.
- The Home Depot: How to Install Cabinet Handles
Supports checking existing holes for reuse, selecting screw length for the mounting thickness, and avoiding overtightening. This article focuses on shopping and an existing-hole replacement, not new drilling.
The notes above identify which guidance each source supports. Layouts and planning examples are editorial suggestions, not tested product claims.